
Creating a $10 Floral Centerpiece With Dollar Tree Items
Ok, so admittedly I’ve watched too many videos on how to make centerpieces from Dollar Tree stuff and had to build my own. I had a lot of fun with this- and it’s an adorable centerpiece for roughly a $10 total cost.

I’m going to walk you through what I did to make this step by step- it was actually super easy. You will need a LOW temp hot glue gun for this project- a high temp gun makes the glue take way too long to cool for this application. Here’s a good option for a reasonably priced glue gun https://amzn.to/3oLpFw7 and you can get your glue sticks anywhere including the Dollar Tree!
After wandering through the Dollar Tree, I came home with a few bunches of flowers, some floral foam and some seemingly random glassware.
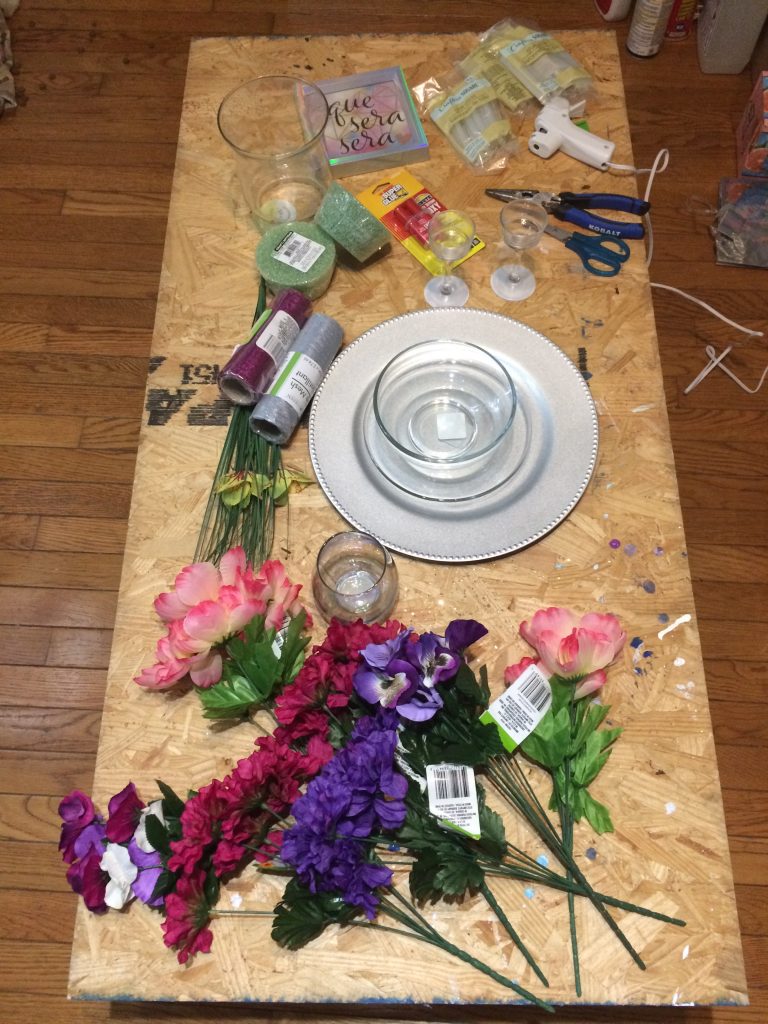
Alright, so maybe I bought a few extra things like a picture frame, ribbon, etc. because I really did not know what I was aiming to create 🙂
I started piling the glassware pieces up and trying to determine how I wanted to make a riser for a flower arrangement. The small tea light holders were no match for holding the heavier pieces of glassware, so I set those to the side for a future project. I decided to use the glass plate, the glass bowl, and the glass iridescent candle holder (all from the Dollar Tree).

To put the riser together, I used hot glue- and this held really well. I’m not expecting this to be a long-term decoration, but if I was I would have beefed up the connections between the glassware with a two part epoxy meant for glass. I’ve seen others using E6000, but I haven’t bothered with it myself (yet).
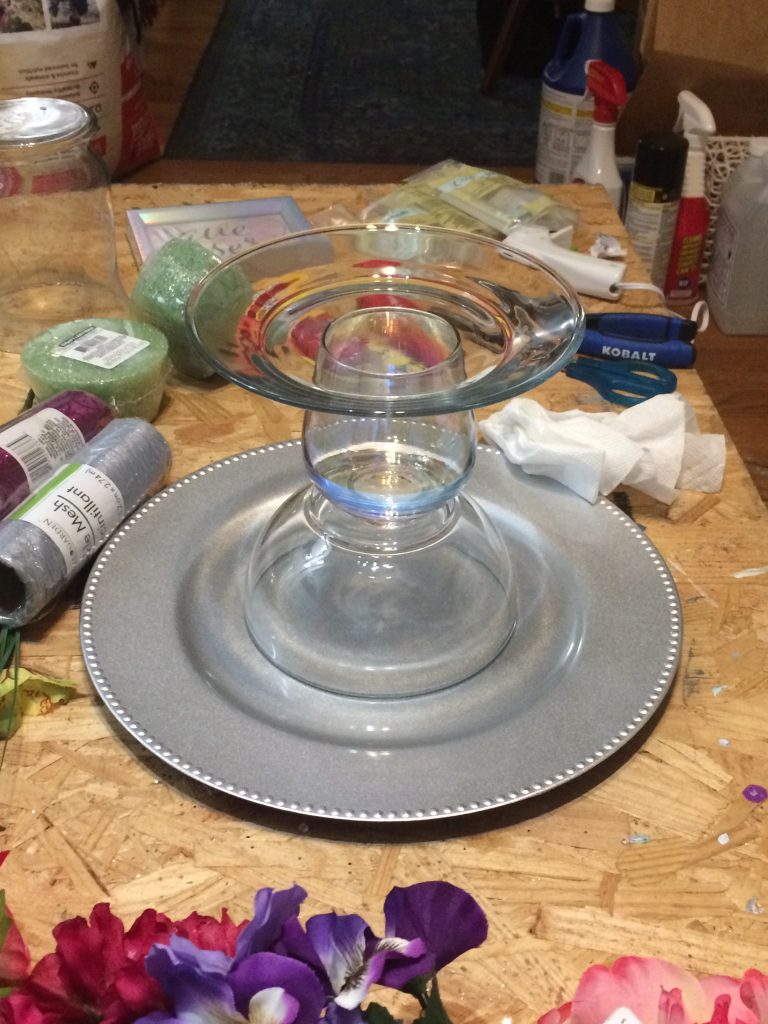
Here’s what the riser looked like assembled. The bowl is upside-down on the bottom. On top of the bowl is the iridescent candle holder, also upside-down. On top of everything is the plate- which I waited to glue down until my flower assembly was complete.
I started my flower assembly by gluing a piece of floral foam (Dollar Tree) to the top of the glass plate.
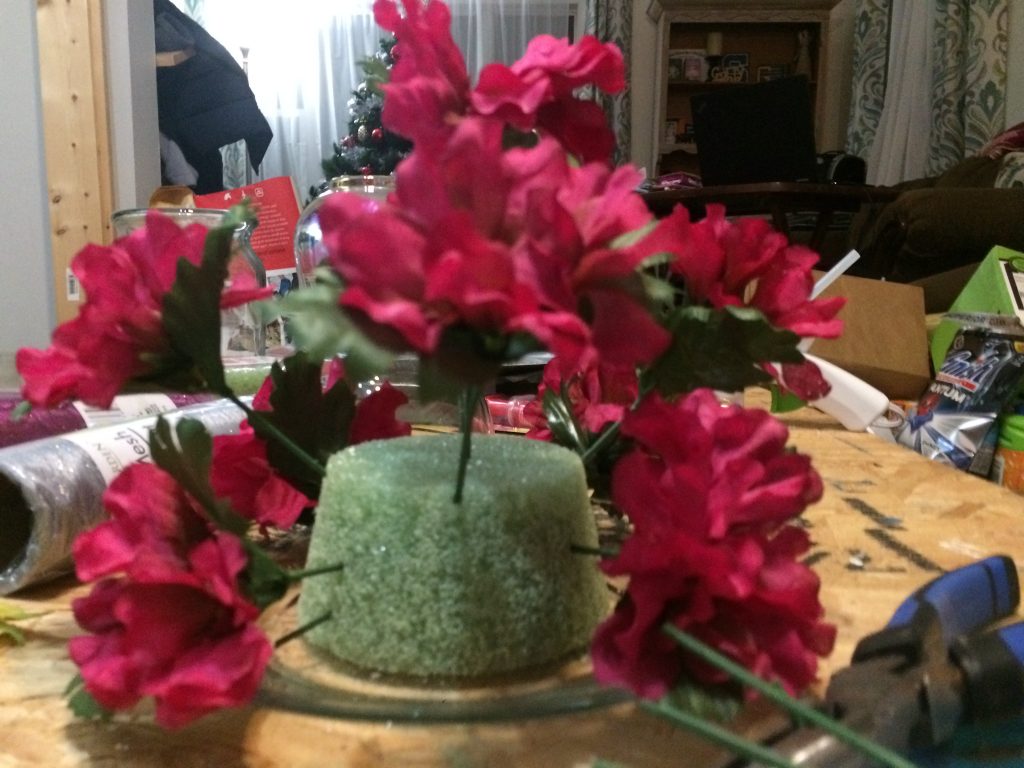
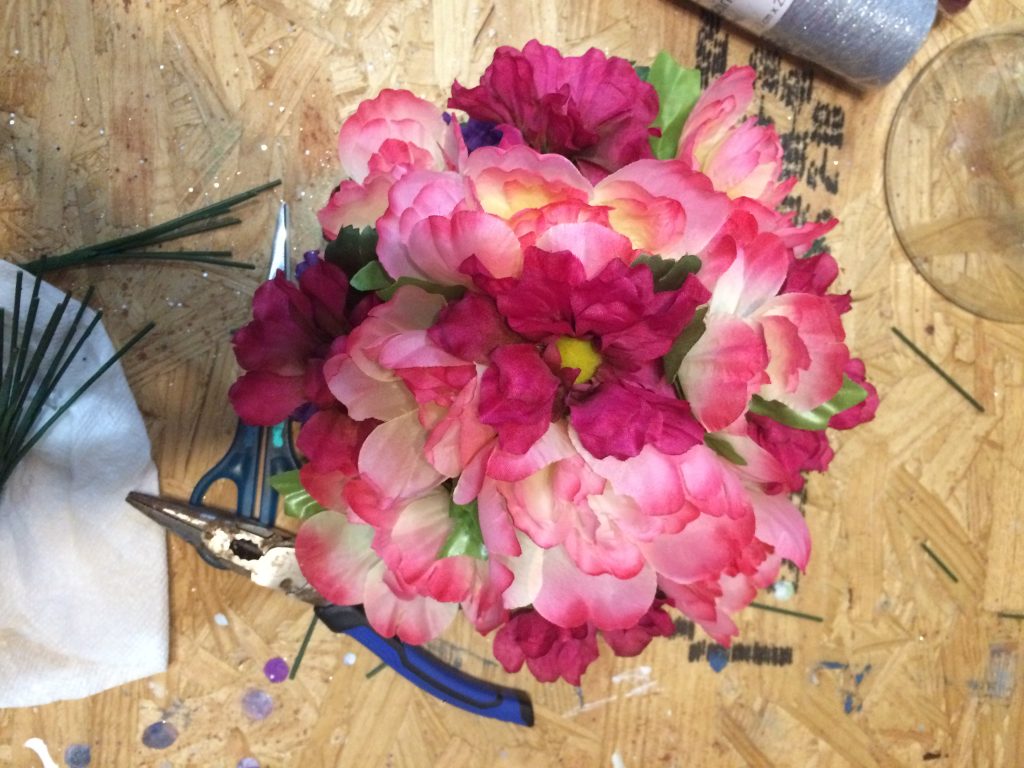
Here you can see the foam is attached to the plate, and I have begun placing flowers into the foam. I cut the flowers off of the bunches (Dollar Tree), leaving enough length on the stem so the flower would touch the edge of the plate after being stuck in the foam. I also pushed the leaves up on the stems of the flowers until they were right under the bloom to give the arrangement a fuller look.
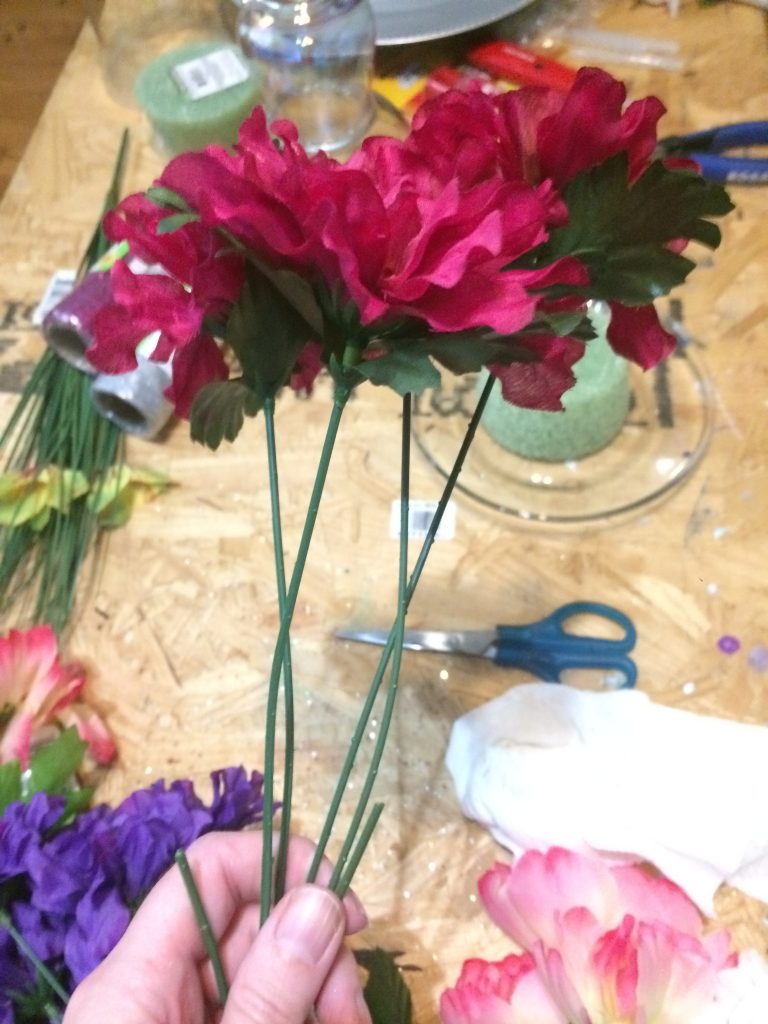
**Side note: The scissors don’t work for this. Grab a pair of pliers with a wire cutter spot in them, or a pair of wire cutters. Life will be easier.
I inserted the burgundy flowers into the floral foam symmetrically in a circle around the side of the foam, and placed a few on top of the foam as well. I added some purple flowers in between those, and checked to make sure that the arrangement was coming out round by pulling the blooms out into a round shape.

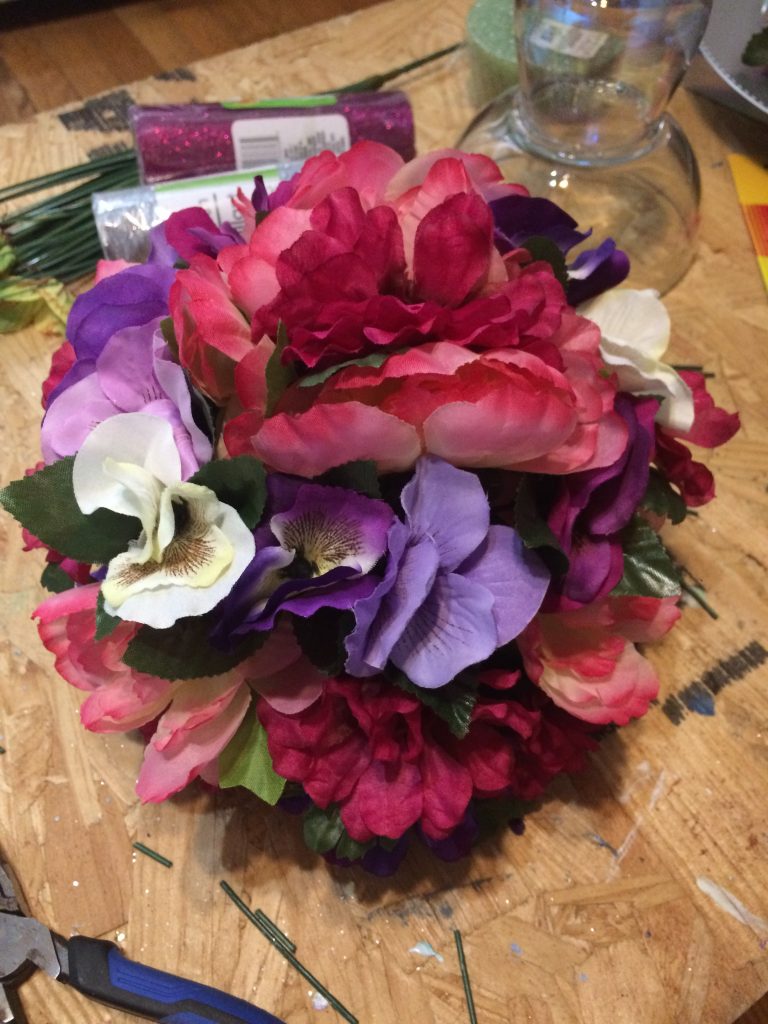
Next, I added in some light pink flowers, keeping with a symmetrical design.
**Side note: The larger the round shape you make, the more flowers you will need to fill out the arrangement.
I continued to add in flowers until the arrangement became fairly full. For some accent color, I added in a smattering of pansies wherever there were sparse spots.
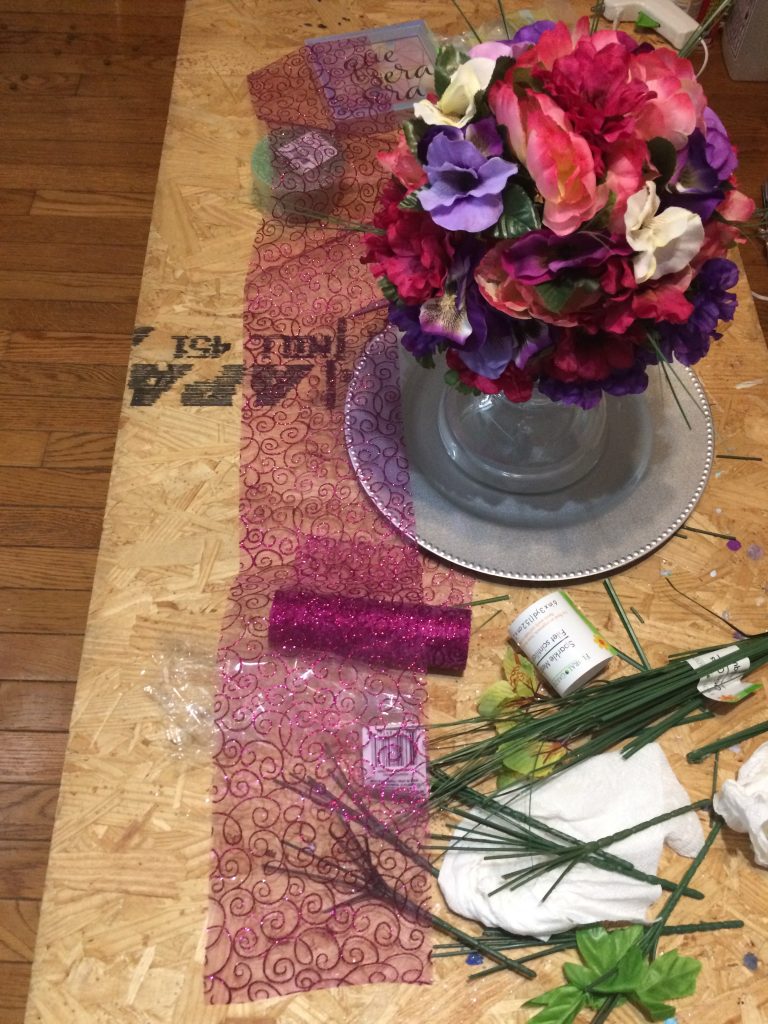
Now, it was time for me to put the arrangement on top of the riser I created earlier. For this, I used a generous amount of hot glue (nearly a whole stick). When I put everything all together, the iridescent candle holder and the glass bowl looked like they didn’t belong together, so I twisted up a bunch of this wide ribbon and tied it in a bow around where the candle holder sat on the bowl. I also added in some lengths of grass with hot glue to mimic a bouquet design I found elsewhere online.
All in all, this adventure cost me about $10, not counting the glue gun, scissors and wire cutters- for a really nice centerpiece. Let me know what you think 🙂

And oh yeah…. make sure to pull off all the hot glue cobwebs…. lol


You May Also Like
One Comment
Pingback: